More Staging Tips


Here is the front of the home I staged. It is what it is--a 1971 Story and a half brick home--however--the siding and brick was power-washed, the bushes trimmed, several trees removed, shutters painted and roof replaced. Some were strictly cosmetic, and some changes were necessary due to damage from a storm, however the really make the house sing. It was always a nice house from the outside, now it is the nicest home on the block.


Beautiful all glass front door greet you as you walk up the front steps.


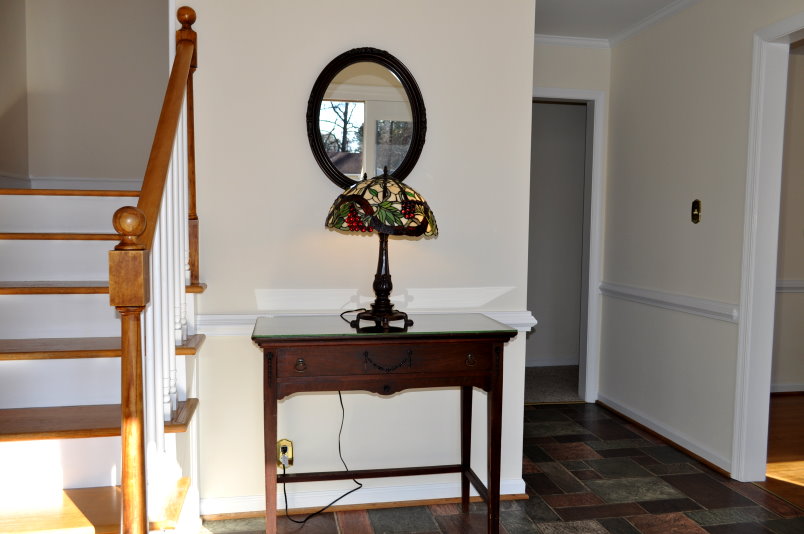
As you first step inside, you are welcomed into a spacious foyer. Here we have simply placed a console table, mirror, and lamp. This is a great place for the other Realtors to leave their cards so we know who has been there. The table and mirror are the home owners and the lamp came out of my office--cost=Free!


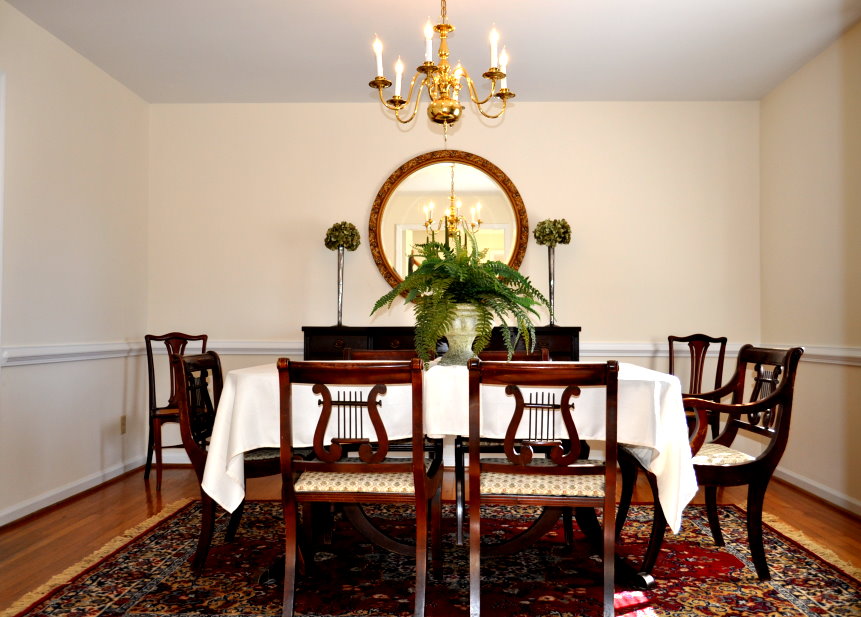
As you peer to your right, you see the beautiful dining room. The furniture, mirror, and rug are the home owners, the chandelier came from the Habitat ReStore, and the faux florals came from my house.
Total cost in this room: $20.00 for the chandelier.


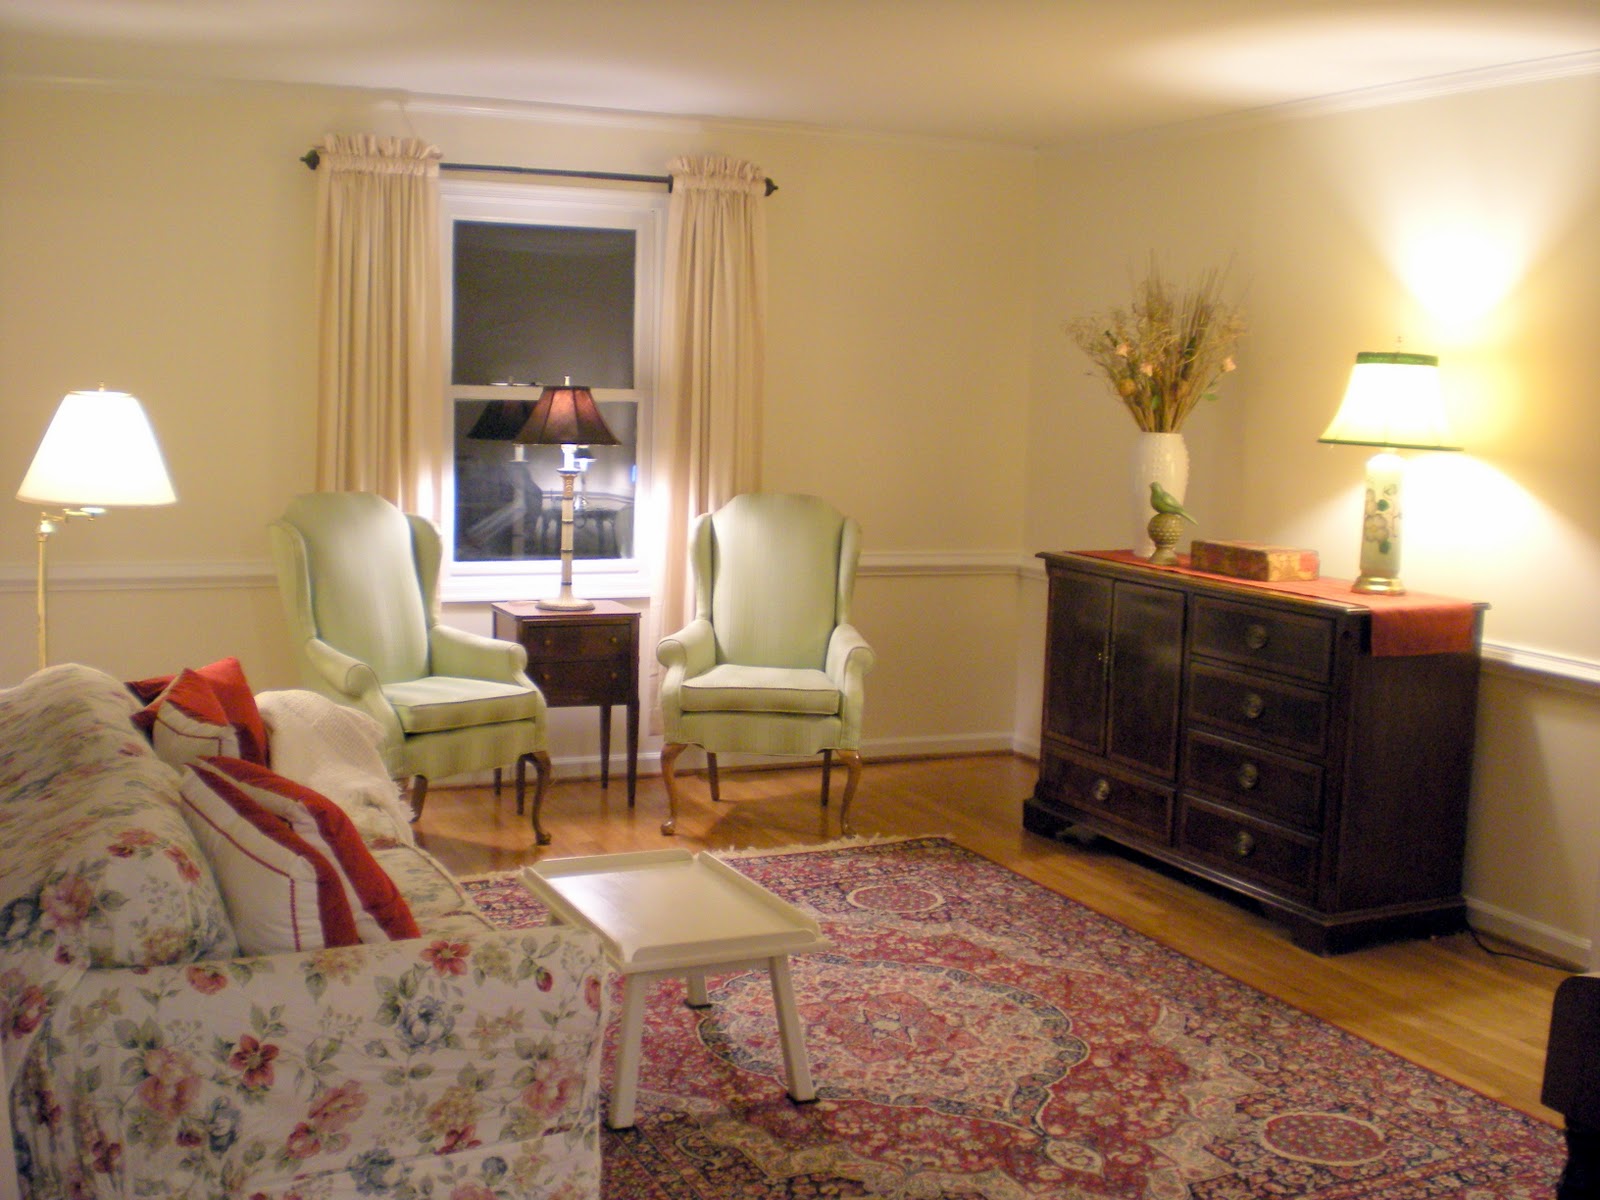
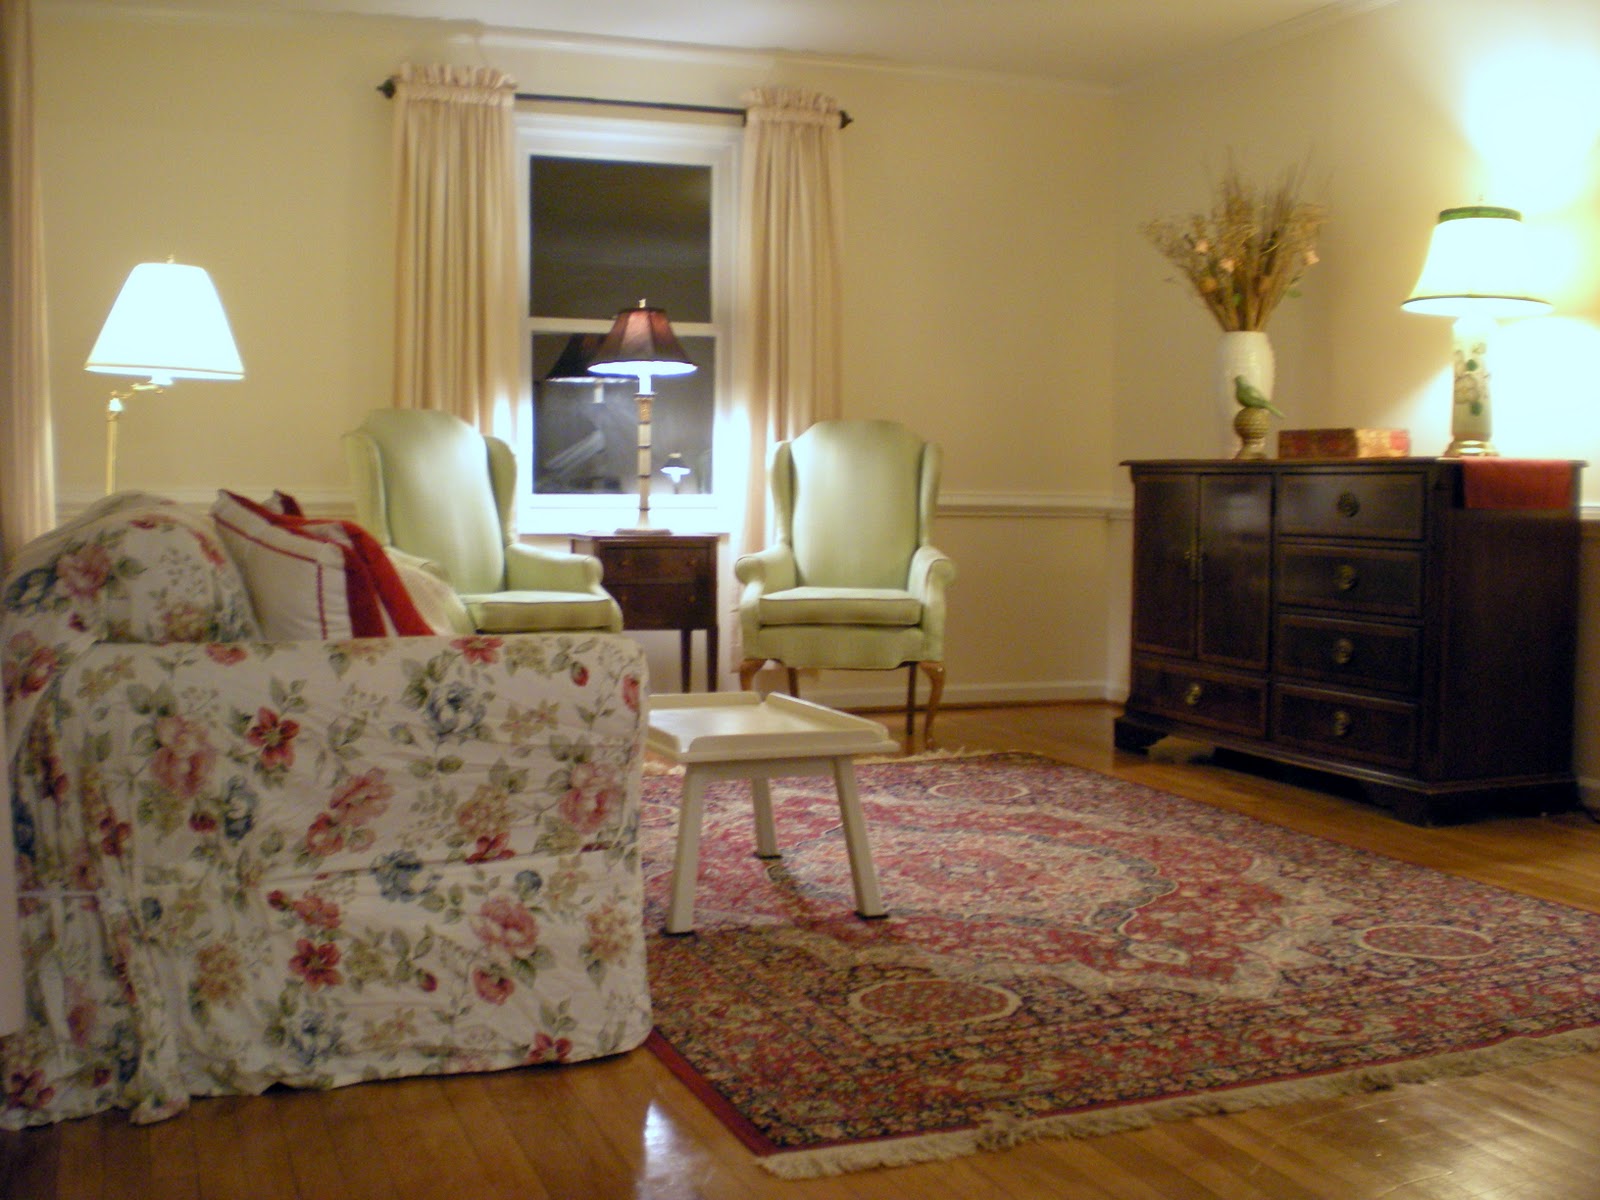
In the formal Living Room, we slipcovered the sofa with a slipcover I had riding around in my car for months. . .spray-painted the homeowners outdated coffee table to update it, and bought a few new fresh and modern accessories at Marshall's--this cost us around $50.00 for this room. The art over the piano again came from my house.


In the family room, I did a mantle scape using found objects from around her house: bottles, an antique mirror, ceiling tin, bread board, and an aluminum pitcher full of branches from the back yard. It really makes a statement and draws your eye to the beautiful fireplace with out overwhelming it. An antique crate of fire wood and some comfortable seating further showcase the room as a place to relay!


Here is another view of the family room. Something as simple as a wardrobe with a basket on top grounds the room, balances the fireplace and doesn't clutter the room up. 


I staged the first floor bedroom as an office--I used what the homeowner had--thankfully she had all of this wonderful vintage and antique furniture to give this room a charming industrial feel--while trendy, it is a fresh and modern take on classic style--what is what you need to do to make your house sell, especially in this market!


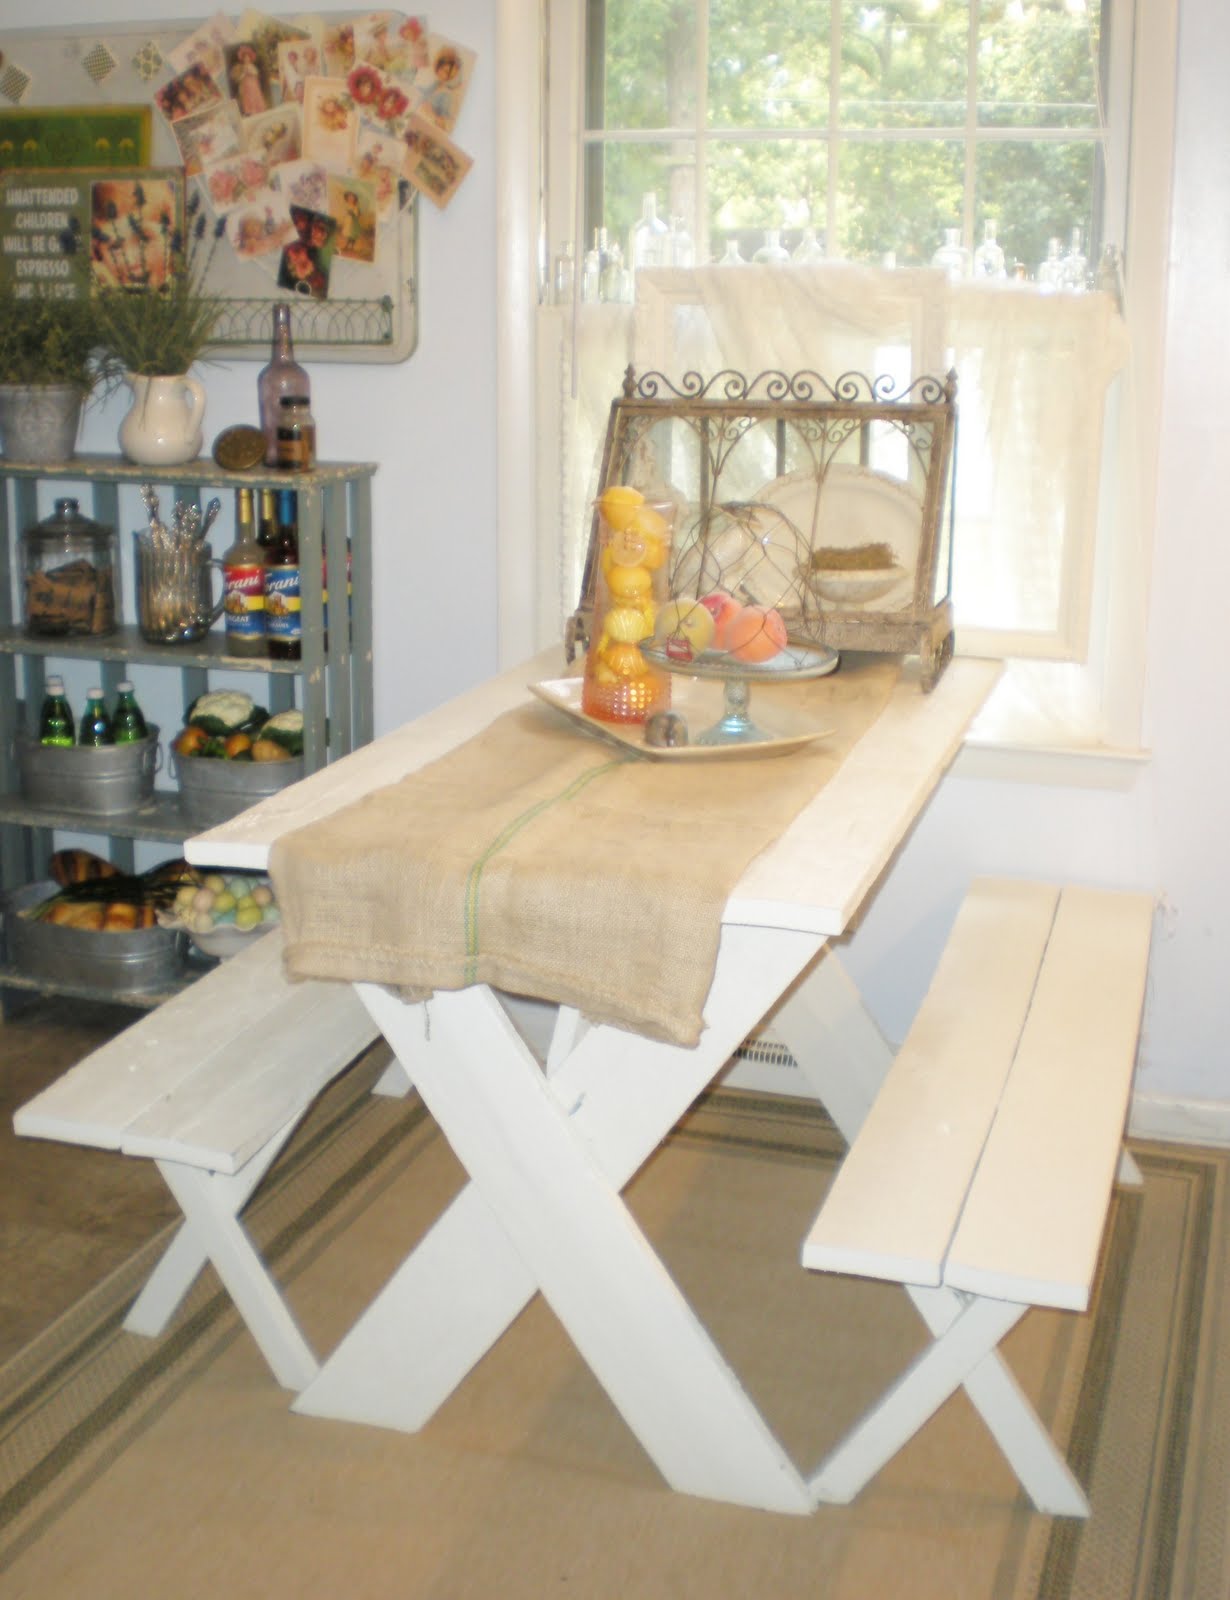
The Realtor, Wanda Bond (http://www.wandabond.com/) brought her breakfast set out of her own kitchen to show what a nice size the kitchen was.  


The homeowner has a HUGE laundry/storage area right off the kitchen--to showcase just how big this room is, we cleverly placed the homeowner's red step stool at the far end to draw the eye. The homeowner also cleared everything off the floor, and organized shelves.


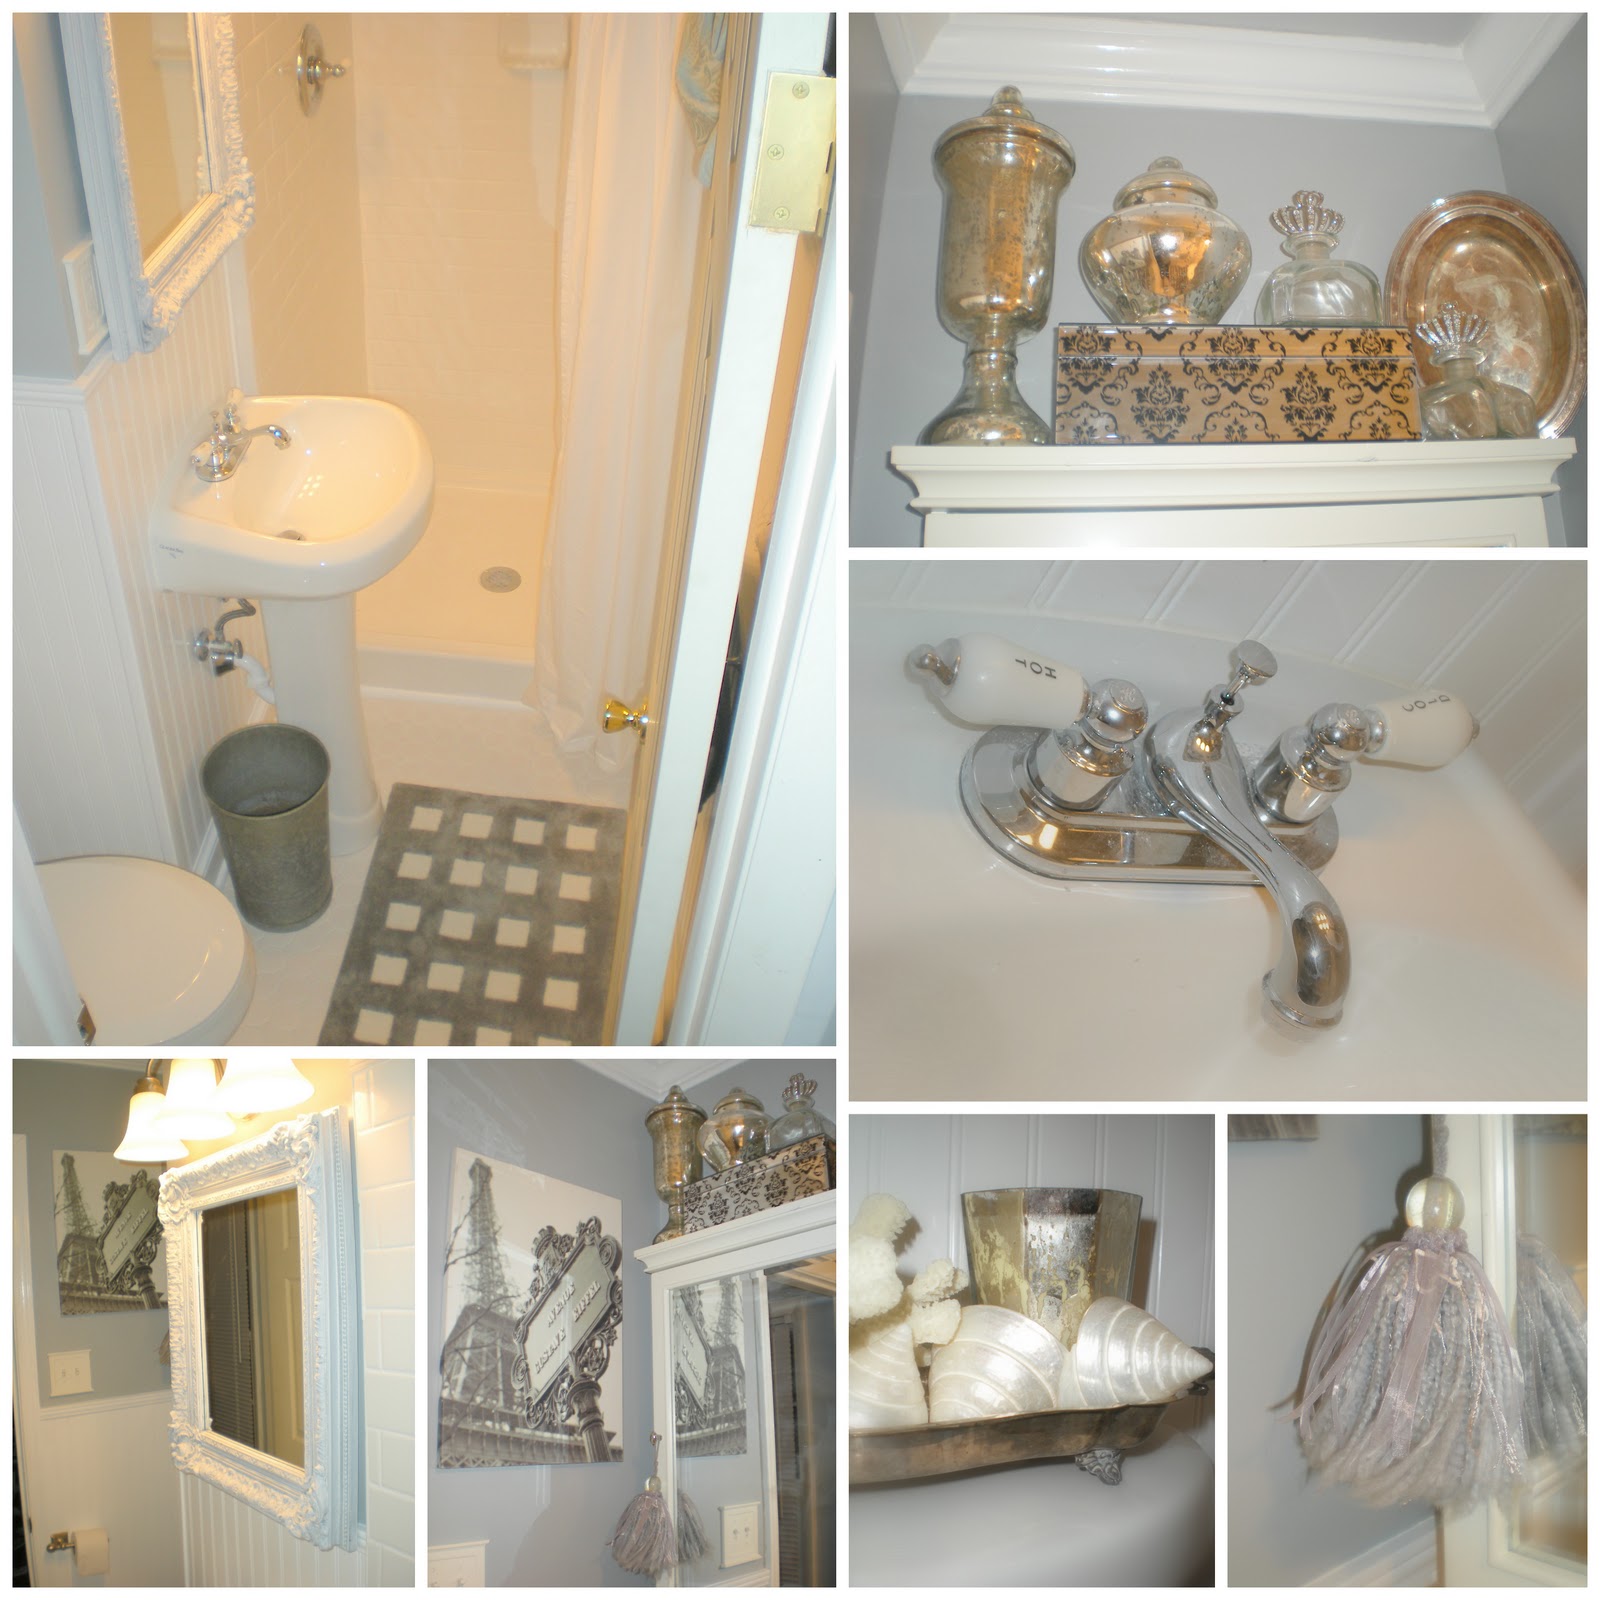
As this is a 1971 house, it still has it's 1971 bathrooms and original fixtures. A few eye-catching accessories really liven up an otherwise blah and all white room. Fresh paint and a super duper cleaning were all it took to make this bathroom really show itself well.


 We needed linens to make the bed in this bedroom--off the the clearance section at Marshall's we went! The bedspread, blanket, and upholstery on the chest are tablecloths! Cleaver positioning of the furniture and a few accessories really liven up the room.


To showcase just how big the master bedroom was, we put the bed on an angle in the corner--this is a queen sized bed, mind you! The rug in the room was beautiful, but the teal color was just too bright and it was the only thing you noticed when you were in this room, to alleviate this fact--I just turned the rug over! You can't always do this, but when it works, the results are amazing! You still have the same beautiful rug, but with more subdued colors.


Here is one last shot of the home! I found out yesterday that there are multiple offers on the house! By the way it's only been on the market for 14 days! It really goes to show that staging really is important when selling a home in this day and age!

Coming soon: Valentine's Day Tree & Spring decorating tips--on a budget!

Mikey @ Shabby French Cottage

Home Staging. . .

I've been busy this week! I, the home owner, and my friend (and Realtor) have been staging a home to get ready to go on the market! Here are a few photos from the house. More should be coming soon!


When it comes to home staging--remember you don't have to spend a fortune to make your house look great! Think of the Four Bs--1. Budget--figure out how much money you can afford to spend on cosmetic fixes and upgrades 2. Barter--trade or sell items you will no longer need or are getting rid of during the move to fund staging. 3. Borrow--if you need a pair of chairs or some neutral art or just a few extra lamps--I'm sure you have a friend willing to lend you a few things--even if it is just to take photos. 4. Buy--the last of the four Bs--sometimes you just need to spend a few Bucks--okay so maybe there are 5 Bs. . .Spend that money wisely--in my next few posts on Home Staging, I will reveal a few tips and shortcuts of ways to make your house look its best when you put it on the market!


We Borrowed this lamp and these chairs from Wanda's (the Realtor) foyer!


We bought a few updated accessories (under $20.00 in this room)


We Bargained.  .  . this slipcover was on sale when I bought it--then the homeowner Borrowed it from me!


Another bargain--these red pillows were an after Christmas clearance! Check back soon for more photos from this amazing house!

Heart to Heart 2011 Sneak Peak!

I'm joining Sarah over at Makin' Projiks in her 2011 Heart to Heart Valentine's Day swap. I and 14 others are creating hand made Valentines! I've already spent most of my free time this week working on it! This is so much fun! Here are some photos of my progress....I'll be sure to post on all the ones I get closer to Valentine's Day!


If you want to re-created this. . . I got the wings at Garden Ridge....


Above is a finished one....at least I think it's finished! I may further embellish...


I cut hearts out of antique Scribners' Magazine pages--thanks Wanda (www.wandabond.com) for all the Scribner's pages!


I downloaded the vintage cherub image somewhere online (I have no idea where...) from a copyright free click art source--if you know where I got this, I'd love to share it with everyone!


I printed a bunch of them on off-white cardstock, cut them out, applied vintage lace, then put that on the heart, and the heart in turn on top of the wings! I have a feeling some vintage mica glitter will be involved as a final step....


The lace is vintage--it is from an 1950's era prom dress....I got this and lots of other vintage ribbons and fabrics at an estate sale about two years ago....I'm still finding cleaver ways to use all the neat things I got there.


For best results printing this--use a laser printer--copy the file to an empty Word document and adjust all the margins to zero. Copy the above image and size it so you can fit 15 per page.


For best results printing this--use a laser printer--copy the file to an empty Word document and adjust all the margins to zero. Copy the above image and size it so you can fit 12 per page (if you do 15 they will be too small....)

Happy Crafting!

~Mikey

Top Five Favorite Posts of 2010

Everyone else is doing it, so I may as well jump on the bandwagon! Here are some of my favorite projects and posts of 2010! To my die hard followers--sorry for the re-run--to my newest followers here is what you missed and a taste of what's in store for 2011!


Budget Master Bath Renovation Though it took way longer than planned--it was worth the effort! This room may be tiny but the style is HUGE!


My Shabby Kitchen I've always wanted a cottage kitchen--now I have one! I'm hoping to do some aesthetic changes (replace upper cabinets with open shelving) in here sometime this year--I'll be sure to post about the whole process!


Shabby Chic Deck Makeover Before I re-did this, my deck was where I spray painted and did other messy projects--so my deck was multi-colored! I'm not sure where my new work area will be, but now I have a place to enjoy the backyard!


New Chandy in the hallway I have a 1964 Ranch Style home--this being said, my hall had the original UGLY 1964 light fixtures--this $10.00 (ten dollar--no typo here) yardsale chandelier really dresses up a usually passed by area!


Garden Urn turned coffee table You can't get around not having a coffee table--but you can get around having a boring coffee table! I took an antique cast-iron urn and filled it with treasures then topped it with glass--a simple way to get a designer look for little green!

To all my new readers--if you haven't done so, please follow me! I will follow back--just keep in mind, it might take me a bit to follow you back--don't fret!

Oh--one more thing--I got the chandelier hung in the Laundry/Mud Room today! That means the reveal is coming soon! Hopefully in time for Cindy's Show and Tell Friday over at My Romantic Home!

Dreamy White Vignette

[Edit: Several readers have asked about what kind of paint I used to paint the bust....I'm pretty sure I used Ice Cream by Rustoleum--it might be Porcelin--almost the same color one is flat, the other is semi gloss. I sprayed it, then while the paint was still wet, I took some 000 steel wool to it to give it a chippy look. Finally I attacked it with some brown paste shoe polish, removing most of it.]

Wow! It's a new year! Heck, this is my first post of the new year! Happy 2011! I've shared this in-progress vignette in the past; but I've tweaked it a bit and wanted to show it to all my new followers who may have not seen it! Remember--there is so much more blog to see--when you get to the bottom of the page; click the link for older posts! It's just that easy!


To put this together I went around the house snatching anything and everything that I thought would look pretty!


There are door knobs, beaded bulb covers, lace, a bridle veil, and lots of other items!


This little lamb appeared in a previous post and several readers had questions about it--I hate to disappoint you, but I know nothing about it! I bought it at a yard sale for a dollar.....


A friend gave me the bust--it was busted and had been glued back together--he thought I could rescue it! When I first got it it was this nasty reddish brown color--out came the white paint.


Once I painted and distressed it--you can't tell where it had been repaired!


I bought this beaded basket from my friend Brenda's booth in the antiques mall where my space is.


She was over recently and asked if I had bought that from her--she says after seeing it in the vignette she regrets selling it now! Ha!

I'm linking up to a bunch of parties--you can find them in my sidebar! If I missed yours--please remind me so I can fix that!

Hopefully my Laundry Room Reveal will be this week!

Enjoy the new year!
Newer Posts Older Posts Home
Please be sure to click on "older post(s)" or "newer post(s)" so you don't miss out on anything!